Arduino's influence among electronics enthusiasts and designers is far-reaching and may be as much as the impact of personal computers in earlier years (such as home computer clubs, etc.). There are millions of Arduinos on the market, and it is estimated that if Arduino is included in the derivatives, it will be more. It is predicted that in the next 5 to 10 years, the school will use Arduino to teach the principles of electronics and interactive systems.
Arduino encapsulates a lot of functions, and the previously complicated functions are now fixed with a simple function. Especially suitable for friends who don't have much professional knowledge but love DIY.
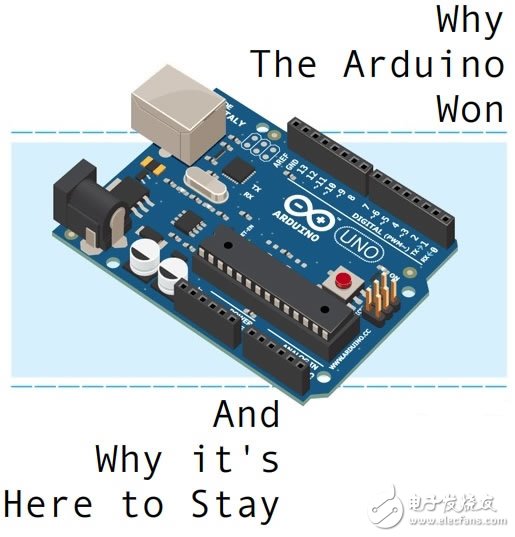
Although the price of the Arduino board is not high, but loyal to the spirit of DIY, hands-on. The cost is about 10 yuan.
Unlike the regular minimum system, this time using Arduino1.0, and using the "Upload using Programmer" function, directly using the USBtinyISP download program, eliminating the usb to serial port downloader, while avoiding a lot of trouble.
Material preparation:
1, ATmega 8 (can be "ATmega 8A-PU", "ATmega 8PU-8PU" or "ATmega 8-16PU", the specific difference will be said below)
2, 22pF ceramic capacitors two
3, crystal oscillator one ("ATmega 8A-PU", "ATmega 8PU-8PU" with 8M, "ATmega 8-16PU" with 16M)
4, USBtinyISP one
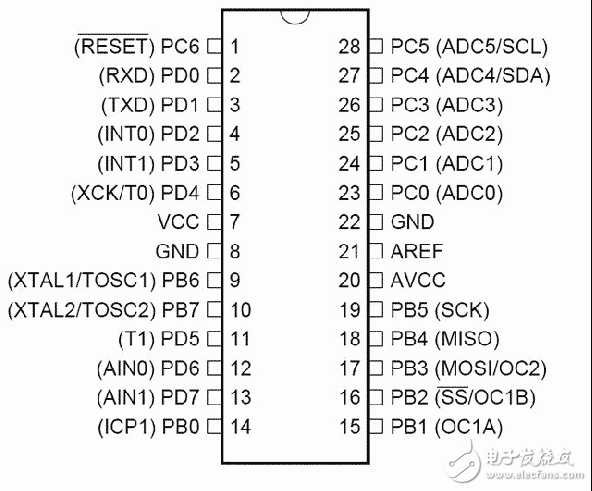
First look at the Atmega8 pin diagram
The circuit is divided into two parts
1. Oscillation circuit:

Connect the crystal to the pin9 (PB6) and pin10 (PB7) of the Atmega8, connect a 22pF capacitor, and finally ground a capacitor.
2. Program download and power supply:
ICSP pin connection diagram:
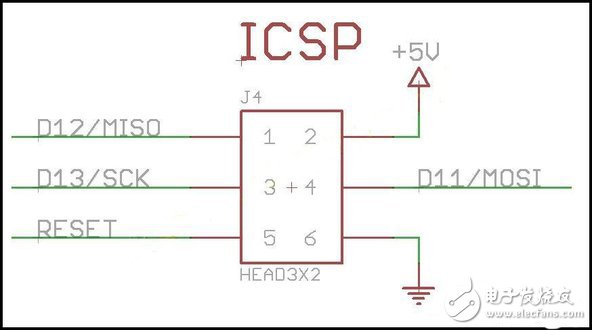
+5V → pin7(VCC)
GND → ping22 (GND)
D11 → pin17 (PB3)
D12 → pin18 (PB4)
D13 → pin19 (PB5)
Reset → pin1(reset)
This is the connected board:
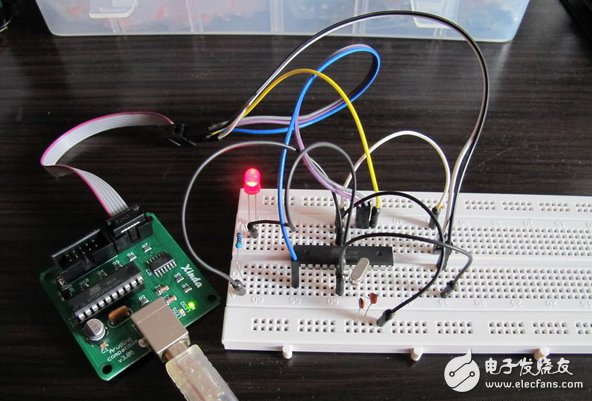
  Added a red LED for power indication
Here's how to download the bootloader for Atmega8. There are two cases now:
1. If it is "ATmega 8A-PU" and "ATmega 8PU-8PU", because the IDE does not directly support the 8M board, you have to modify it yourself:
Download the following file, extract it and put it in the hardware\arduino\bootloaders\optiboot directory, and add the following information in hardware\arduino\boards.txt:
01.########################################################################### ##############
02.
03.atmega8_8M.name=ATmega8_8MHz
04.
05.atmega8_8M.upload.protocol=arduino
06.atmega8_8M.upload.maximum_size=7168
07.atmega8_8M.upload.speed=115200
08.
09.atmega8_8M.bootloader.low_fuses=0xa4
10.atmega8_8M.bootloader.high_fuses=0xdc
11.atmega8_8M.bootloader.path=optiboot
12.atmega8_8M.bootloader.file=optiboot_atmega8_8M.hex
13.atmega8_8M.bootloader.unlock_bits=0x3F
14.atmega8_8M.bootloader.lock_bits=0x0F
15.
16.atmega8_8M.build.mcu=atmega8
17.atmega8_8M.build.f_cpu=8000000L
18.atmega8_8M.build.core=arduino
19.atmega8_8M.build.variant=standard
At this point, start the IDE, you can see "Atmega8_8M" on the board, choose him right.
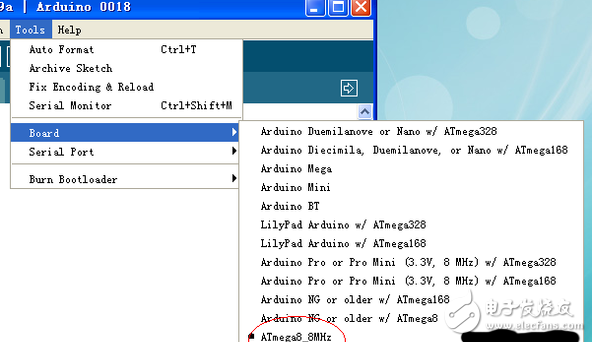
2. If it is an ATmega 8-16PU, you can select "arduino NG or w / ATmega 8" directly when selecting the board.
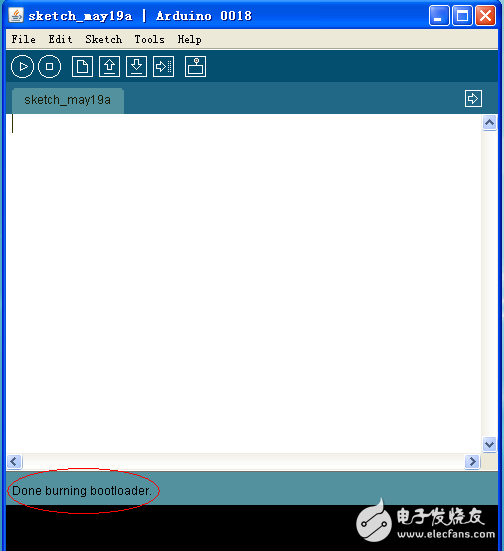
After selecting the board, use USBtinyISP to download the bootloader. When you see the following picture, it means the download is successful.
Ok, from here on, it is different from other minimal systems. Usually we use a USB to TTL downloader to download the program, but for various reasons, many times it will go wrong. So today we use the "Upload using Programmer" feature of Arduino 1.0 to download the program.
First, the circuit connection is unchanged, or use the line to download the bootloader. Then make sure that the IDE you are using is Arduino 1.0 (on the official website of Arduino, you can see it on the download software page), and then select the board, or the same as above, ATmega 8-16PU can be used directly; "ATmega 8A-PU "And "ATmega 8PU-8PU" please modify the program first, then write the code (I wrote a flashing program to test).
Int led = 12;
Void setup()
{
pinMode(led,OUTPUT);
}
Void loop()
{
digitalWrite(led,HIGH);
Delay(1000);
digitalWrite(led,LOW);
Delay(1000);
}
After writing, click on the leftmost hook (compile).
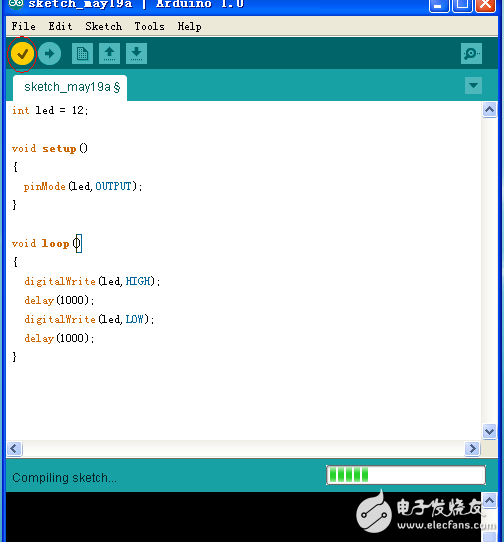
Finally, download, you can look at it, add a new "Programmer" under the tools, select USBtinyISP after opening, Serial Port does not have to choose.
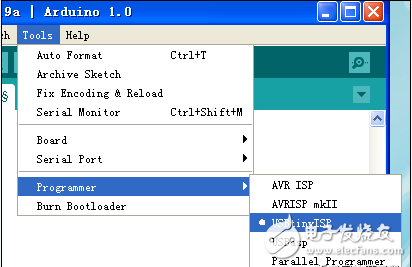
Finally open "File", you can see "Upload using Programmer", click on the program to start downloading.
This is the photo after the program is downloaded. If the picture is moving, you can see the green LED flashing.
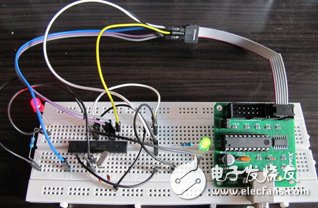
Summary: If you make the smallest system in the same way as before, download the bootloader and the program to use two sets of circuits. Moreover, when downloading the program, TX and DX have high requirements for the download line, and a reset circuit is also required. With the Upload using Programmer download program, only one set of circuits is needed, which simplifies the inconvenience caused by the connection circuit, does not require a converter, and does not require a reset circuit. Maximally avoided a lot of trouble.
Interested students can try it.
This is the smallest system that is then welded to the hole plate, and the effect is not bad~

Lcd Tonch Screen For Iphone 8,Lcd Touch Screen For Iphone 8P,Lcd Display For Iphone 8P,Mobile Lcd For Iphone 8P
Shenzhen Xiangying touch photoelectric co., ltd. , https://www.starstpmobile.com
