We usually use Word to edit documents, and generally use the default page number settings. Although the default setting is easy, it can be very uncoordinated or even misplaced when you encounter special requirements. So today, the author will come to share the page number setting method under several special scenarios.
Double-sided printing page outside alignment
To save paper, we have double-sided printing. Most printers support semi-automatic two-sided printing, which means that the odd-numbered pages are printed first, then the pages are turned over and all the even-numbered pages are printed. Therefore, we need to set the odd-numbered pages and the even-numbered pages separately. If the printed document is ready to be bound on the left side, the page number is preferably on the right side. In this case, the odd-numbered page number remains on the right side and the even-numbered page number moves to the left side.
Take Word 2013 as an example here (all versions apply to 2007). First switch to the "Page Layout" tab, click to expand "Page Settings", and in the window that opens, switch to "Layout", and then check the "Every even and odd page. Item, click "OK" to return (Figure 1).
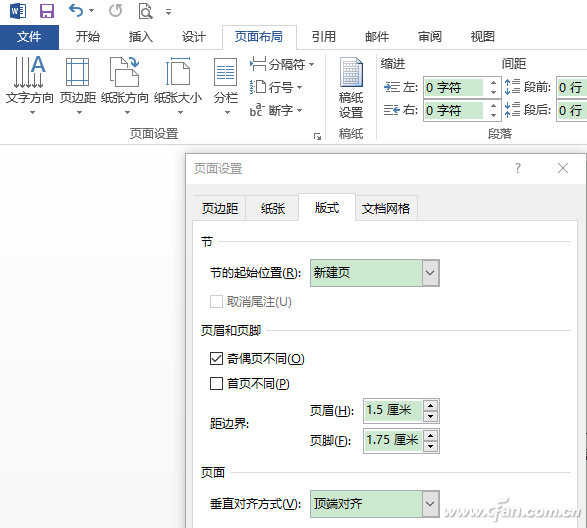
Figure 1 sets the parity page different
Next, set the page number for the odd-numbered pages and the even-numbered pages, respectively. Place the insertion cursor on any odd-numbered page, such as page 1, page 3, etc., and then switch to the "Insert" tab, click the "page number" button in the toolbar, this example in the pop-up menu, select "under the bottom of the page" A page number is displayed on the right side of the style, you can choose other styles according to your needs (Figure 2). In the same way, insert the cursor into an even page (eg page 2) and insert a page number. This example selects the left style at the bottom of the page.
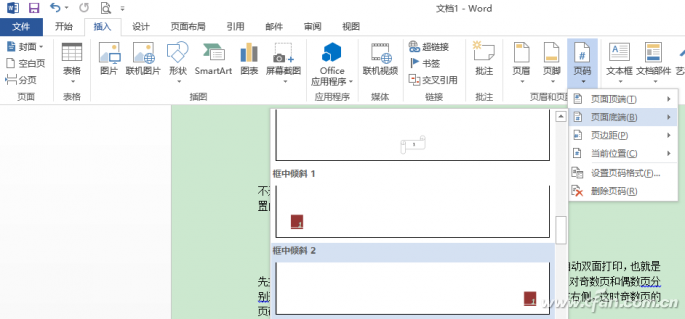
Figure 2 Selecting the right page style at the bottom of the page
Then it is simple, enter the print interface, select to print an odd number of pages first, after the completion of the printed paper in turn hit an even number of pages. As you can see, the page numbering is ordered and all page numbers are aligned on the outside.
Independent horizontal layout page number settings
In general, Word documents are vertically formatted, but sometimes because of special circumstances, such as inserting a relatively large table or picture, you need to set this separate page to landscape (Figure 3).

Figure 3 Inserting a horizontal layout between portrait layouts
As shown in the figure above, if you print out the binding, the page number of the horizontal version will go to the upper right, because it is impossible to make horizontal and vertical inconsistencies during binding, which causes it to misalign with the page numbers of other layouts. Now you can adjust the page number position of this version separately. In this example, you can move it from the original lower right corner to the lower left corner. Double-click on the page number in the horizontal page to enter the "Page header and footer design" interface, select the page number in the horizontal version, and then in the point tool "Design" tab, click cancel "Link to the previous header" item will pop up A reminder box asks if you want to delete the header and footer on this page and click "Yes" to confirm (Figure 4).

Figure 4 Prompt whether to delete the page header and footer on this page
Now you can freely drag it to a new position. Here we drag it to the left of the footer (Figure 5). As a result, although the horizontal and vertical versions are mixed, it is possible to ensure the bound documents. All page numbers are on the same side of the outside.
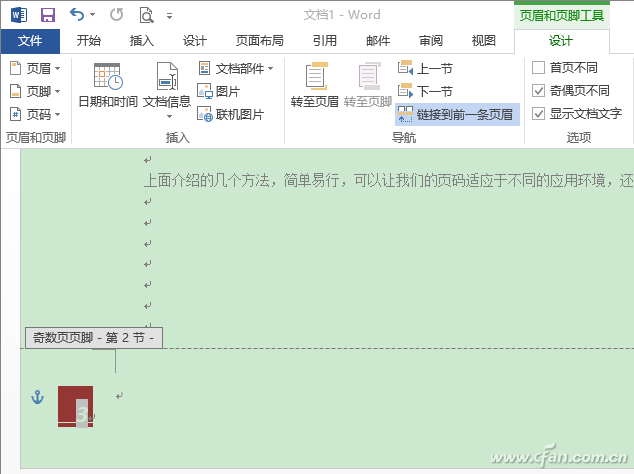
Figure 5 Move the page number to the specified position
Add pages to each column
For extremely long documents, many times we will choose a column layout. In this case, if you can add a page number (ie, two pages per page) under each column, it will increase legibility. This looks very difficult, but it is also easy to set up.
First, double-click the document footer to enter the footer editing interface. Then, corresponding to the position of the column, enter two page number mark words, such as “page†(Figure 6).
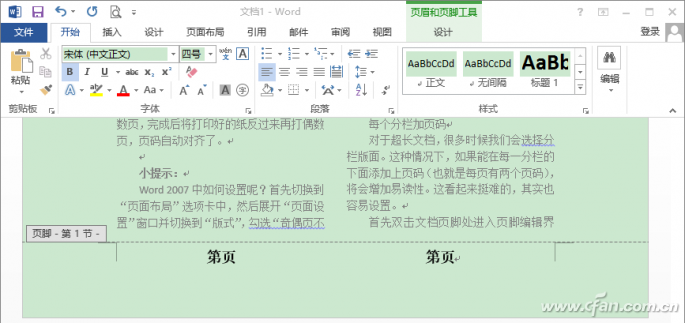
Figure 6 Setting Page Marker Text
Place the cursor between the words "Page" and press Ctrl+F9 to enter a field mark, a pair of curly brackets. Note that you must press the shortcut key and the manually entered curly braces are invalid. Enter an equal sign in curly brackets, then press Ctrl+F9 again to enter a pair of curly brackets, enter the code “page†in the parentheses, and enter “*2 - 1 †outside the parentheses (Figure 7 without Outside quotes).

Figure 7 input field formula
Copy the above field code to the word "page" under the second column, and slightly modify it, that is, delete "-1", and the field code here becomes "{ = {page }" *2 }". Of course, you can also re-enter as above. After the input is completed, press the Alt+F9 key to switch to the result state and display the column number. If it is not displayed yet, press Ctrl+A to select all, and press F9 to refresh. In fact, there is a method that is right-click the field code, select "switch field code" from the right-click menu, you can display the domain of the calculation results. Right-click again to select "Switch domain code", it will re-enter the editing state of the domain (Figure 8).
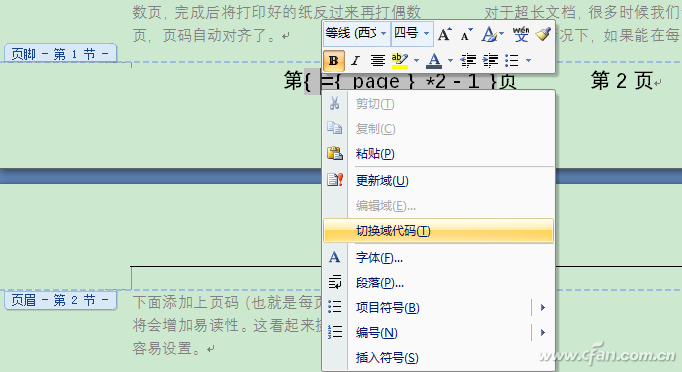
Figure 8 Switching Between Domain Formulas and Calculation Results
The above-mentioned several methods, simple and easy, can make our page number adapt to different application environments, not bad.
SHENZHEN CHONDEKUAI TECHNOLOGY CO.LTD , https://www.szsiheyi.com
